Last updated November 18, 2026








Free written scope consultation - allowances, timeline, and change-order rules on paper before a single trade is scheduled
Bathroom Remodeling Troubleshooting: Common Problems and How to Fix Them
A hairline crack in new tile grout within 90 days of install isn’t bad luck. It’s either an improperly prepared substrate or tile set without proper expansion joints, and both are workmanship defects a written guarantee should cover. Here’s the uncomfortable truth we’ve learned over years of fixing other contractors’ bathrooms in Winchester: most post-remodel problems aren’t construction mysteries. They’re documentation failures. When you can’t prove what was agreed to, every cracked tile or leaking valve turns into a “he said, she said” instead of a contract question. This guide walks through the five most common post-remodel defects, how to read a warranty that actually protects you, and what to document so you have standing when something fails.
Quick Answer
Most bathroom remodel problems trace back to three causes: poor substrate preparation, improper waterproofing, or missing documentation that would prove who’s responsible. Grout cracking, caulk separation, and slow drains are almost always workmanship defects, not material failures, and a written warranty that clearly separates workmanship from materials is what determines whether you get a free fix or a bill. Before you sign anything, get the guarantee in writing with the exact coverage terms spelled out.
Styles & brands we work with
- Kitchen remodeling
- Bathroom remodeling
- Home additions & ADU
- Roofing
- Windows & doors
- Driveway & pavers
- Fence
Table of Contents
- The Five Most Common Post-Remodel Defects (and Their Real Causes)
- Grout Cracking Within 90 Days: What It Actually Means
- Caulk Separation at the Tub Deck and Shower Base
- Slow Drain After Tile Work
- Exhaust Fan Failure and Moisture Damage
- How to Read a Written Warranty: Workmanship vs. Materials
- What to Document During a Remodel (Photos by Phase)
- The Unlicensed Subcontractor Problem
- What a Legitimate Punch List Looks Like
The Five Most Common Post-Remodel Defects (and Their Real Causes)
In our experience across Winchester bathroom remodels, the same five problems show up again and again. Knowing the trade cause behind each one tells you whether you’re looking at a workmanship defect, a material failure, or normal wear.
- Grout cracking. Caused by substrate flex, missing expansion joints at the perimeter, or tile set over greenboard instead of a proper cement backer or uncoupling membrane.
- Caulk separation at the tub deck. Caused by caulk applied over a wet joint, use of non-flexible caulk where the tub meets the wall, or a tub that wasn’t set level before tile went down.
- Slow drain post-tile. Caused by thinset or grout washed down the drain during install, a rough-in that wasn’t protected, or a trap arm pitched wrong during re-plumbing.
- Exhaust fan failure. Caused by a fan sized for the wrong CFM, ducted into an attic rather than outdoors, or wired to a switch that doesn’t run long enough to clear moisture. In Winchester’s dry climate, homeowners sometimes skip the fan entirely, which traps shower moisture against the ceiling and causes paint failure and mold at the corners.
- Door swing interference. Caused by a door hinged without accounting for the tile thickness added to the wall, or a pocket door framed at rough-in dimensions that didn’t account for the finished opening.
Every one of these has a documented trade cause. None of them are “just how it goes.” Our technicians have up to 22 years of experience, and they can tell you from the first look whether a defect is a workmanship issue or a material one. That distinction is the whole ballgame when you’re trying to get something fixed under warranty.
Grout Cracking Within 90 Days: What It Actually Means
Grout cracking inside the first three months means the substrate under the tile is moving, the tile has nowhere to expand, or the grout was mixed and cured wrong. It is rarely a grout problem by itself.
The two most common causes we find in Winchester bathrooms are substrate flex and missing expansion joints. Substrate flex happens when tile goes over plywood or greenboard without a cement backer board or uncoupling membrane. Wood moves with humidity; tile doesn’t. The grout, which is the weakest link, takes the movement and cracks. Missing expansion joints at the perimeter and at any change of plane force the tile assembly to push against walls and corners with no relief, and the grout cracks along the shortest line of stress.
What to check before you call anyone:
- Run your hand along the cracked line. If the tile on either side feels loose or hollow when tapped, the substrate is the problem, not the grout.
- Look at where the crack starts and ends. A crack that runs from a corner or a wall edge points to a missing expansion joint.
- Check the age. Cracking within 90 days is a workmanship issue. Cracking after 5-7 years may be normal movement and is a maintenance item.
If the substrate is the cause, regrouting won’t fix it. The tile has to come up and the substrate has to be done right. That’s a real cost, and it’s exactly the kind of defect a written workmanship guarantee should cover. The 365-Day Done Right Promise exists for this reason: if the work fails within the guarantee period, Bradford Remodeling Co Winchester returns and corrects it at no charge. Our bathroom remodeling in Winchester work carries that guarantee in writing before a single tool comes out.
Caulk Separation at the Tub Deck and Shower Base
Caulk pulling away at the tub deck or shower base is a workmanship defect when it happens within the first year, and it’s usually caused by one of three things: caulk applied to a wet joint, the wrong caulk for the joint, or a tub that wasn’t set level.
Here’s what goes wrong. Caulk won’t bond to a damp surface. If the installer applied it before the joint was fully dry, or before the tub was shimmed and set, the caulk skin cures but the bond underneath fails. When the tub settles or the joint moves, the caulk lets go in a clean line. The second cause is using a rigid caulk where a flexible one is needed. Silicone or a hybrid caulk handles movement at the tub-to-wall joint; standard painter’s caulk does not. The third is a tub that rocks because it wasn’t set in a mortar bed or shimmed properly. That movement will open a caulk joint again and again, no matter how many times it’s redone.
What to look for:
- A clean, straight separation line (a bond failure) versus a ragged, torn line (a material failure).
- Any movement when you step into the tub near the joint. If the tub rocks, the caulk is a symptom, not the cause.
- Water staining behind the caulk line. If water got in, the wall behind the tile may need inspection.
Recaulking a joint is a small repair, but if the underlying cause is a tub that wasn’t set right, it will keep coming back. That’s a scope issue that should have been handled at rough-in, and a written guarantee on the install is what gets it corrected without a second invoice.
Slow Drain After Tile Work
A drain that runs slow right after a bathroom remodel is almost always debris in the trap or a rough-in that was damaged or mispitched during the tile work. It is not a normal part of settling in.
During a tile job, thinset and grout get washed down the drain if the rough-in isn’t capped and protected. Even a small amount settles in the P-trap or the trap arm and narrows the flow. The fix is simple if it’s debris (the trap gets opened and cleared), but if the trap arm was pitched wrong during re-plumbing, the drain will stay slow or back up until the pitch is corrected. That’s a plumbing defect, and it’s one of the reasons the rough-in inspection matters: a plumber who pulled a permit and passed inspection left a paper trail showing the drain was run to code before tile went down.
What to check first:
- Pour a bucket of water into the drain. If it backs up immediately, the clog is close. If it drains slowly but steadily, the restriction is further down.
- Remove the drain strainer and look for visible grout or thinset. A small amount near the top can be cleared without opening the trap.
- If the slow drain appears only when the sink or tub is running, the venting may be the issue, not the trap.
Here’s the documentation point: if the GC subcontracted the plumbing and disclosed that relationship in the contract, the GC is responsible for that sub’s work. If the relationship wasn’t disclosed, you may be stuck trying to track down a plumber you never hired. That’s why the contract has to name the subs.
Exhaust Fan Failure and Moisture Damage
An exhaust fan that fails or underperforms after a remodel causes damage far beyond the fan itself: peeling paint, mold at the ceiling corners, and eventually rot in the framing above the shower. In Winchester’s dry climate, it’s tempting to skip the fan or run it briefly, but the moisture from a 20-minute shower still has to go somewhere. It goes into the ceiling and walls.
The three causes we see:
- Undersized fan. A fan rated for 50 CFM in a 100-square-foot bathroom won’t clear the humidity. The rule of thumb is 1 CFM per square foot of bathroom, plus more if the ceiling is high or the shower is large.
- Ducted into the attic. A fan that dumps warm, moist air into the attic rather than outdoors condenses on the roof deck and framing. In Winchester’s cold winter nights, that moisture freezes and thaws, and the damage shows up as staining and rot.
- Wired to the wrong switch. A fan on the same switch as the vanity light runs only when the light is on. It needs its own switch or a timer so it runs 20-30 minutes after the shower ends.
Check the fan by holding a tissue to the grille. If the tissue won’t stay up, the fan isn’t moving enough air. Then check where the duct terminates. If it ends in the attic, that’s a code issue and a defect that should be corrected under the guarantee.
How to Read a Written Warranty: Workmanship vs. Materials
A written warranty is only as good as its definitions. The single most important distinction in any bathroom remodel warranty is between workmanship coverage and materials coverage, and most homeowners never read it until something fails.
Workmanship coverage is the contractor’s promise that the installation was done correctly. If a tile comes loose because the substrate was prepped wrong, that’s a workmanship failure. If a valve leaks because it was installed without thread sealant or torqued wrong, that’s a workmanship failure. Workmanship coverage is what protects you against the contractor’s own labor, and it’s the coverage most warranties hide behind vague language.
Materials coverage is the manufacturer’s promise that the product itself was sound. If a Kohler faucet cartridge fails internally, that’s a materials failure, and it’s handled under Kohler’s warranty, not the contractor’s. If a KraftMaid cabinet door warps due to a manufacturing defect, that’s materials coverage. The contractor’s job is to install the material to spec; the manufacturer’s job is to warranty the material itself.
What a written warranty should spell out, line by line:
- The exact length of workmanship coverage, in months, from the date of substantial completion.
- What’s covered (labor to correct the defect) versus what’s not (damage from neglect, water damage from a failed homeowner-installed item).
- Who handles materials claims, and whether the contractor will act as your point of contact.
- What the remedy is: a free return visit, a repair, or a refund.
The 365-Day Done Right Promise is written that way: a full-year written guarantee on completed projects, and if the work fails inside that window, we come back and correct it at no charge. Not a verbal promise at the door. A document in your hand at close, with the coverage spelled out. That’s The Garrison Standard in practice: every price and every guarantee in writing before a single tool comes out.
What to Document During a Remodel (Photos by Phase)
If you want standing in a dispute over a bathroom remodel, document the job by phase, not all at once at the end. Photos taken before the walls close up are the only proof of what’s behind the tile, and they’re the difference between a contract question and a “he said, she said.”
- Demo and framing. Photograph the exposed studs, the old plumbing, and any rot or water damage found. This establishes the starting condition.
- Rough-in plumbing and electrical. Photograph every pipe, valve, and wire before the backer board goes on. This is the single most valuable set of photos you’ll take, because it shows what was actually installed and where.
- Rough-in sign-off. Get the inspection card or sign-off in writing before close-up. A signed rough-in inspection is the record that the plumbing and electrical were done to code before tile.
- Waterproofing. Photograph the membrane, the pan, and the flood-test water level. Waterproofing failures are the most expensive defect to fix, and the photos are the only proof it was done.
- Tile set and grout. Photograph expansion joints and the layout. A missing expansion joint is easy to prove with a photo taken during install.
- Punch list and close. Photograph the completed work and get the signed punch list and warranty in hand at close.
Keep the photos in a dated folder and save the written scope next to them. When a defect shows up at month nine, you can prove what was agreed to and what was installed. That’s the whole point. A bathroom remodel in Winchester that’s documented by phase is a job you can hold someone to. One that isn’t is a negotiation you’ll lose.
The Unlicensed Subcontractor Problem
If a plumbing sub causes a leak, the general contractor is liable for the work, but only if the relationship was disclosed in the contract. That’s the rule homeowners miss most often, and it’s the reason the contract matters as much as the workmanship.
When a licensed GC hires a subcontractor, the GC is generally responsible for that sub’s work under the contract. But the protection depends on the homeowner knowing who did the work. If the plumbing was subbed out and the contract lists the plumbing as included work, the GC is on the hook for the leak. If the contract is vague about who performs the plumbing, or if the plumbing was arranged separately by the homeowner, the claim gets murky fast. The legal reality: liability follows the contract, and the contract has to name the relationship.
What to look for before you sign:
- The scope should list each trade (plumbing, electrical, tile) and state whether it’s done by the GC or a named subcontractor.
- If subs are used, ask for the licensed sub’s name and the type of work they’re doing, and get it in the written scope.
- Confirm that permits are pulled and inspections passed. A permit pulls the licensed trades onto the record and gives you a paper trail.
Unlicensed sub work is a gamble most homeowners don’t know they’re taking. A by-the-book contractor pulls permits and puts the sub relationships in writing. The work holds up and the paperwork holds up. That’s the same discipline behind our general contractor in Winchester work: written price, documented scope, permits pulled, inspections passed.
What a Legitimate Punch List Looks Like
A legitimate punch list is a written, itemized list of every defect and unfinished item, signed by the contractor and the homeowner at job close. A contractor who considers the job done when he leaves isn’t following a punch list, and that’s a red flag before the final invoice.
The right process:
- A scheduled walk-through. The contractor and homeowner walk the finished bathroom together. Not a text or a phone call. A walk.
- Itemized in writing. Each defect gets its own line: location, what’s wrong, and what the correction is. “Caulk at tub deck, south corner, separated” is a punch item. “Touch up caulk” is not.
- Photos attached. Every punch item has a photo. That removes any argument about what was seen.
- A completion date. Each item gets a date, not a range. “Week of the 14th” is not a date.
- Signed by both parties. The homeowner keeps a signed copy, and the warranty document is handed over at the same time.
- Re-walk and sign-off. The contractor re-walks the list with the homeowner, item by item, and the final invoice is issued only after the list is cleared.
Squared away at close looks like this: a clean site, a documented scope, a signed punch list, and a written guarantee in your hand. If a contractor won’t do that, the workmanship behind the walls is a question mark you can’t answer until something fails.
Common Mistakes to Avoid
- Paying the final invoice before the punch list is cleared. Once the check clears, the incentive to return drops. Hold the final payment until the walk-through is signed.
- Accepting a verbal warranty. A promise at the door isn’t coverage. Get the exact workmanship term in writing, with the remedy spelled out.
- Skipping photos during rough-in. Once the backer board goes up, you have no proof of what’s behind it. The photos are cheap insurance and the best evidence you’ll have.
- Hiring a contractor who won’t pull permits. Permits bring the licensed trades and the inspection record onto the job. Skipping them is a shortcut that shows up as defects later.
- Letting a subcontractor relationship stay vague. If a plumber is doing the rough-in, the contract should say so. That sentence is what holds the GC to the plumbing work.
- Ignoring a fan that doesn’t move air. In Winchester’s climate, a weak exhaust fan causes ceiling paint failure and corner mold before most homeowners notice anything. Test it at close.
- Treating a 90-day grout crack as normal. It’s a workmanship signal. Document it, report it, and get it on the punch list while coverage is active.
See the difference
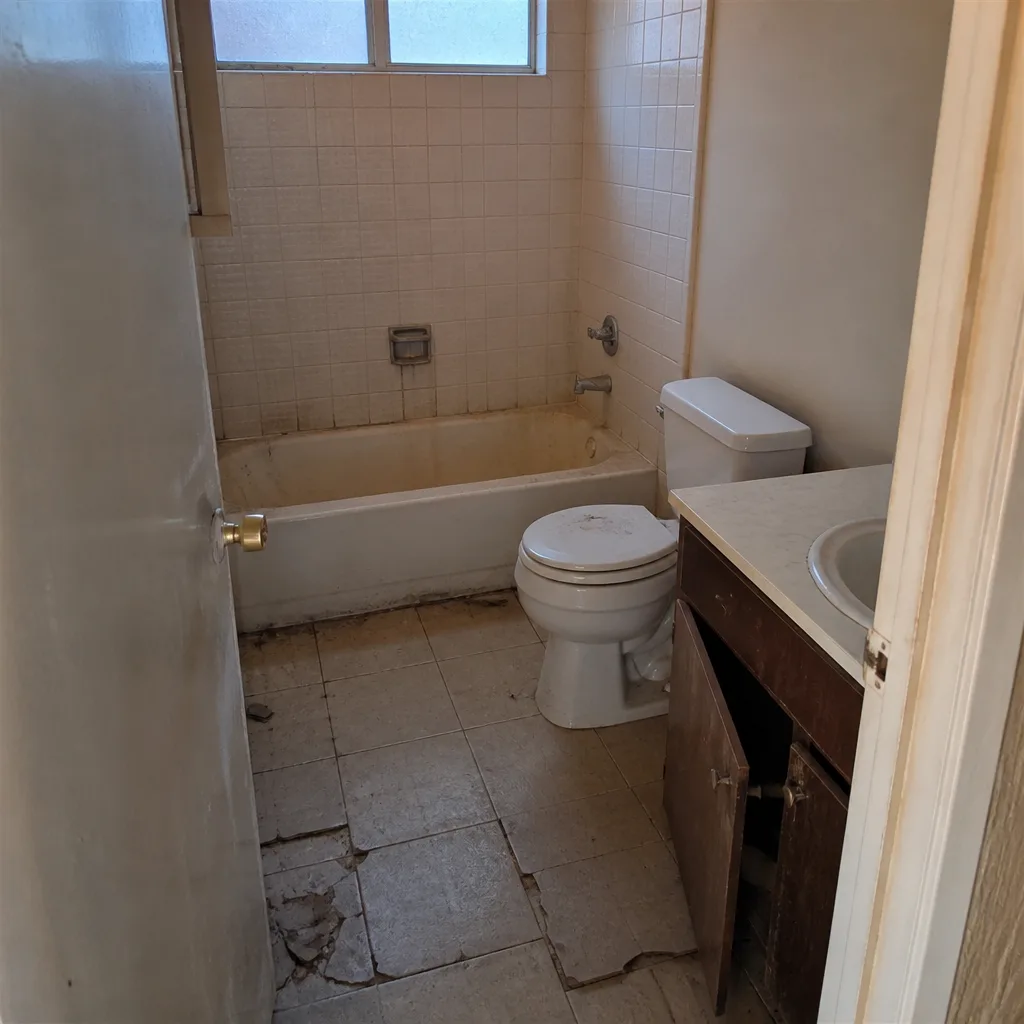 Before
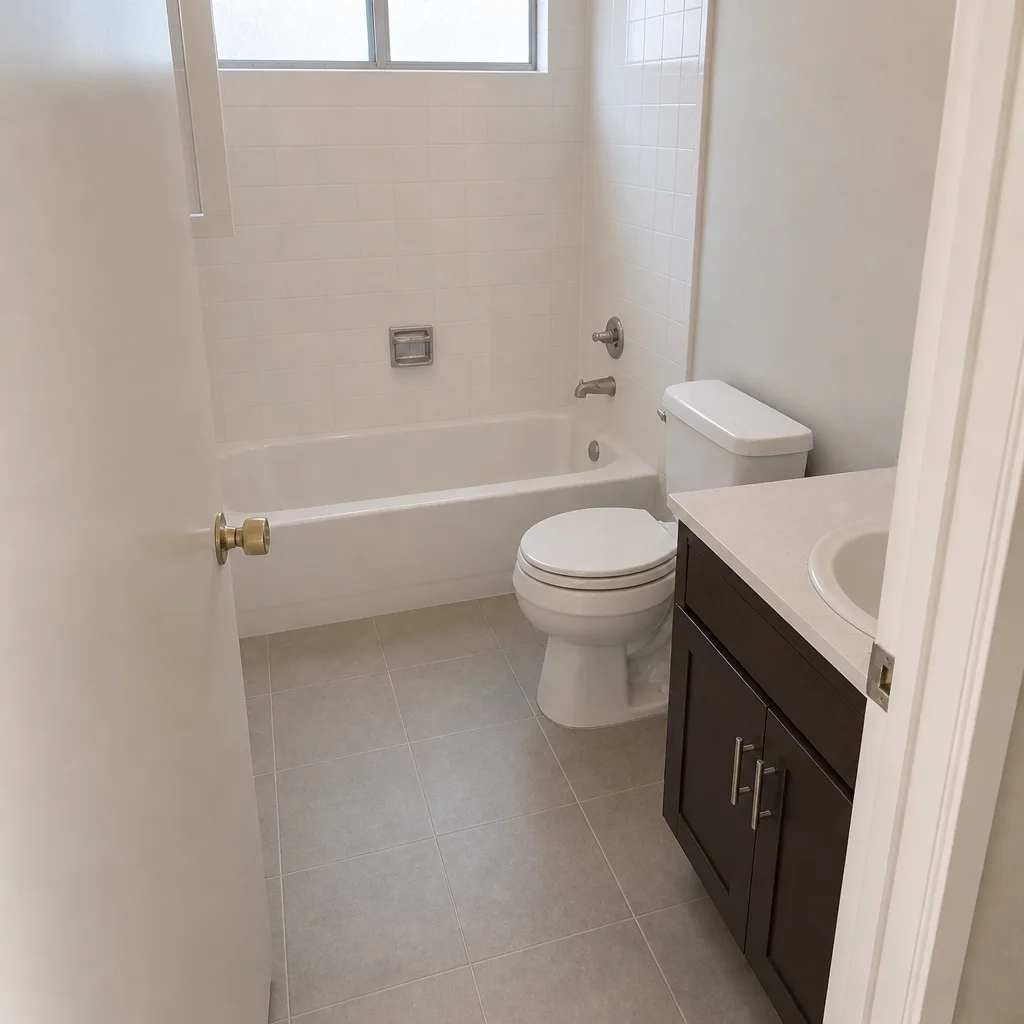 After
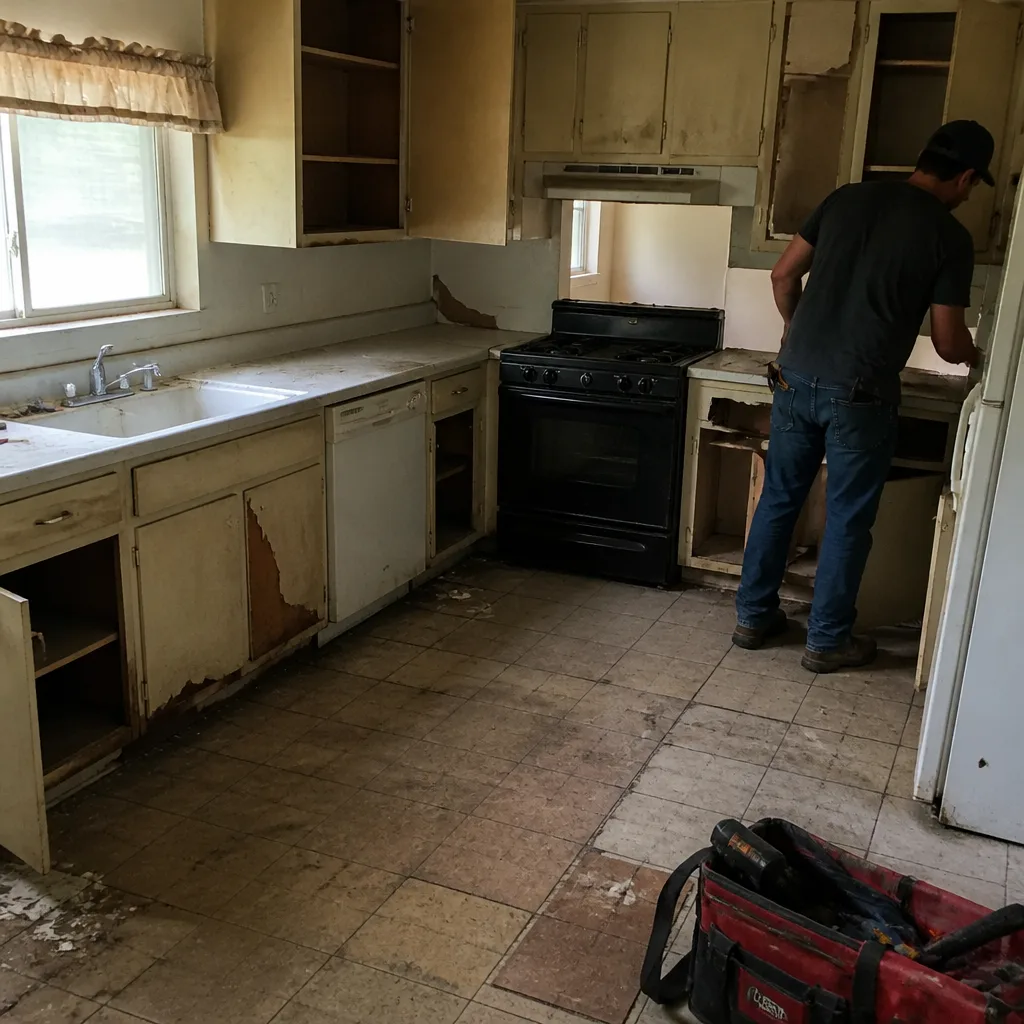 Before
 After
 Before
 After
When to Call a Professional
Call a professional when a defect falls outside your ability to diagnose without opening a wall, when the defect is in the rough-in plumbing or electrical, or when the fix would void a warranty by touching the work yourself. Specific cases that warrant a call: a tub that rocks at the joint, a drain that slows within the first year, a fan that won’t hold a tissue, any crack that starts at an expansion joint, and any leak behind tile. All of these are workmanship questions, and the answer depends on the written scope and the guarantee. If you’re mid-remodel and unsure whether a defect is covered, the fastest path is a documented inspection and a written opinion. Bradford Remodeling Co Winchester offers free estimates in Winchester – call (844) 972-4839 to schedule yours. If you’re planning a remodel and want the scope and guarantee in writing before work starts, that’s the same conversation. See our bathroom remodeling in Winchester page for the full scope, or the kitchen remodeling in Winchester guide if the project extends beyond the bath. For whole-home scope, start at the Bradford Remodeling Co Winchester home page.
Frequently Asked Questions
It depends on the written guarantee, but a crack within 90 days is usually a workmanship defect and should be covered. The determining factor is the warranty’s definition of workmanship coverage and its term length. Get the coverage in writing before the job starts, and document the crack with a photo and the date it appeared. Call (844) 972-4839 for a free estimate if you’re planning the job and want to see how the guarantee is written.
A regrout runs a few hundred dollars; a substrate tear-out and re-tile runs into the thousands. The cost swing is entirely about whether the defect is a workmanship issue (covered) or a materials issue (handled by the manufacturer). If it’s covered, the fix is free. If not, expect a line-item written quote before any work begins. Bradford Remodeling Co Winchester gives a written price before work starts, every time. Call (844) 972-4839 for an exact quote – estimates are free.
No, a written price doesn’t move. The whole point of The Garrison Standard is that the price is fixed in writing before a tool comes out. If a contractor’s number moves at the door, the price wasn’t written. Ask for the line-item quote and the scope before you sign. Call (844) 972-4839 to schedule a free estimate.
Yes. Permits are pulled and inspections passed on our bathroom remodel work, and that record is part of what protects you. A permit brings the licensed plumbing and electrical trades onto the job and creates a paper trail you can use if a defect gets disputed. If a contractor won’t pull permits, that’s a signal to walk. Call (844) 972-4839 for details on your Winchester project.
Workmanship covers how the product was installed; materials covers the product itself. A tile that comes loose from a badly prepped substrate is workmanship. A faucet cartridge that fails internally is materials, handled under the manufacturer’s warranty. Both should be spelled out in writing, with a clear remedy and a length of coverage. Our 365-Day Done Right Promise covers the workmanship, and we also work with documented brands like Kohler and Moen, so materials warranties are traceable. Call (844) 972-4839 for a free estimate.
A full bath remodel typically runs two to four weeks once work starts, depending on scope and whether the layout changes. The bigger variable is the pre-work phase: permits, material lead times, and the written scope and schedule. Get the schedule in writing with the price. Call (844) 972-4839 for a free estimate and a written timeline.
The Bottom Line
Most bathroom remodel problems aren’t construction surprises. They’re documentation failures. Grout cracks, caulk separation, slow drains, and fan failures all have documented trade causes, and the only thing that separates a free fix from a second invoice is what the written guarantee says. Document the job by phase, get the scope to name the subs, confirm permits are pulled, and read the warranty’s workmanship definitions before you sign. A contractor who puts the price and the guarantee in writing before work starts is the one who’ll make it right when something fails. Brad